How To Build a Wine Cellar
When building a wine cellar, the wine cellar must be designed and constructed like a refrigerator. Installing a wine cooling system in the wall without converting the room correctly will not work properly and could cause damage to your walls, ceiling and most of your wine. Room preparation of your wine cellar is key to controlling the environmental factors that may negatively affect the storing and aging of your wine. A properly constructed wine cellar will allow you to use the smallest cooling system possible. This article is a brief guide; additional information is available in the Wine Storage Education Center.
Please feel free to contact us for any additional information on wine cellar building or wine cellar design. E-mail or call 1 800-876-8789.
Ceiling: The ceiling must have a minimum of R-19 insulation and a vapor barrier.
Floor: concrete ground floors need a vapor barrier only (sealed with concrete sealant). Any above ground floors need to be R-19 with a vapor barrier.
Vapor Barrier: The vapor barrier (we recommend a 6 or 8 mil plastic sheeting) must be installed on the warm side of the insulation. The warm side means that the vapor barrier is protected from wine cellar (cold side) by insulation. Putting the vapor barrier on the wine cellar side of the insulation will cause the humidity to condensate on the barrier and could cause damage to your walls. The vapor barrier must be either applied to the outside walls and ceiling. If it is impossible to get to the outside, then the plastic must be applied from within the cellar. The most common method is to wrap the entire interior, leaving the plastic loose in the stud cavity so the insulation can be placed between each stud. All walls and ceiling must be wrapped in plastic for a complete vapor barrier.
Typical Wine Cellar Conversion Steps

Seal concrete floor with water-based sealant (Make sure if you are going to tile the floor that the sealant is compatible with tile adhesive). Install vapor barrier on walls and ceiling.
Fur out walls using 2” x 2” or 2” x 4” strips. Use 1 ½” rigid (Cleotex/R-max type with foil on both sides) for interior walls, 3” for exterior walls and ceiling. Using fiberglass insulation will require 2” x 4” and 2” x 6” fur out to achieve the required R factors. We recommend rigid foam board insulation. All cracks should be filled with expanding spray foam. The general rule for a cellar is the thicker the walls, the better the insulation factor, the better the cellar remains at a consistent temperature.
Select good doors (and windows, though it is best not to have windows in a wine cellar). The door must be solid core or insulated. Glass doors must be dual pane insulated glass and the cooling system must be sized correctly. Doors must be weather-stripped and air tight. Check for air leakage in room, switches, pipes, vents, and other sources. Windows should be double-paned as well. The use of recessed lighting isn't recommended. Use low-voltage track type lighting instead. Remember that you can never over-insulate or over-seal your wine cellar.
Finished wall surface materials: Drywall (preferable green board) or Redwood and other rot and mildew resistant woods. All paints and/or stains must be water based and the cellar aired out thoroughly after application to rid the wine cellar of odors. Once cooling and humidity is operating smells will only get worse, so be careful. Similar considerations apply to flooring. See below for more information on materials.
We size your refrigeration requirements by room volume, climate and total R-factors of your wine cellar. To calculate volume: Width x Depth x Height = cubic area. We carry a wide range of wine cooling systems in sizes to suit spaces as small as a cabinet up to commercial-scale wine rooms. See below for more information on cooling units.
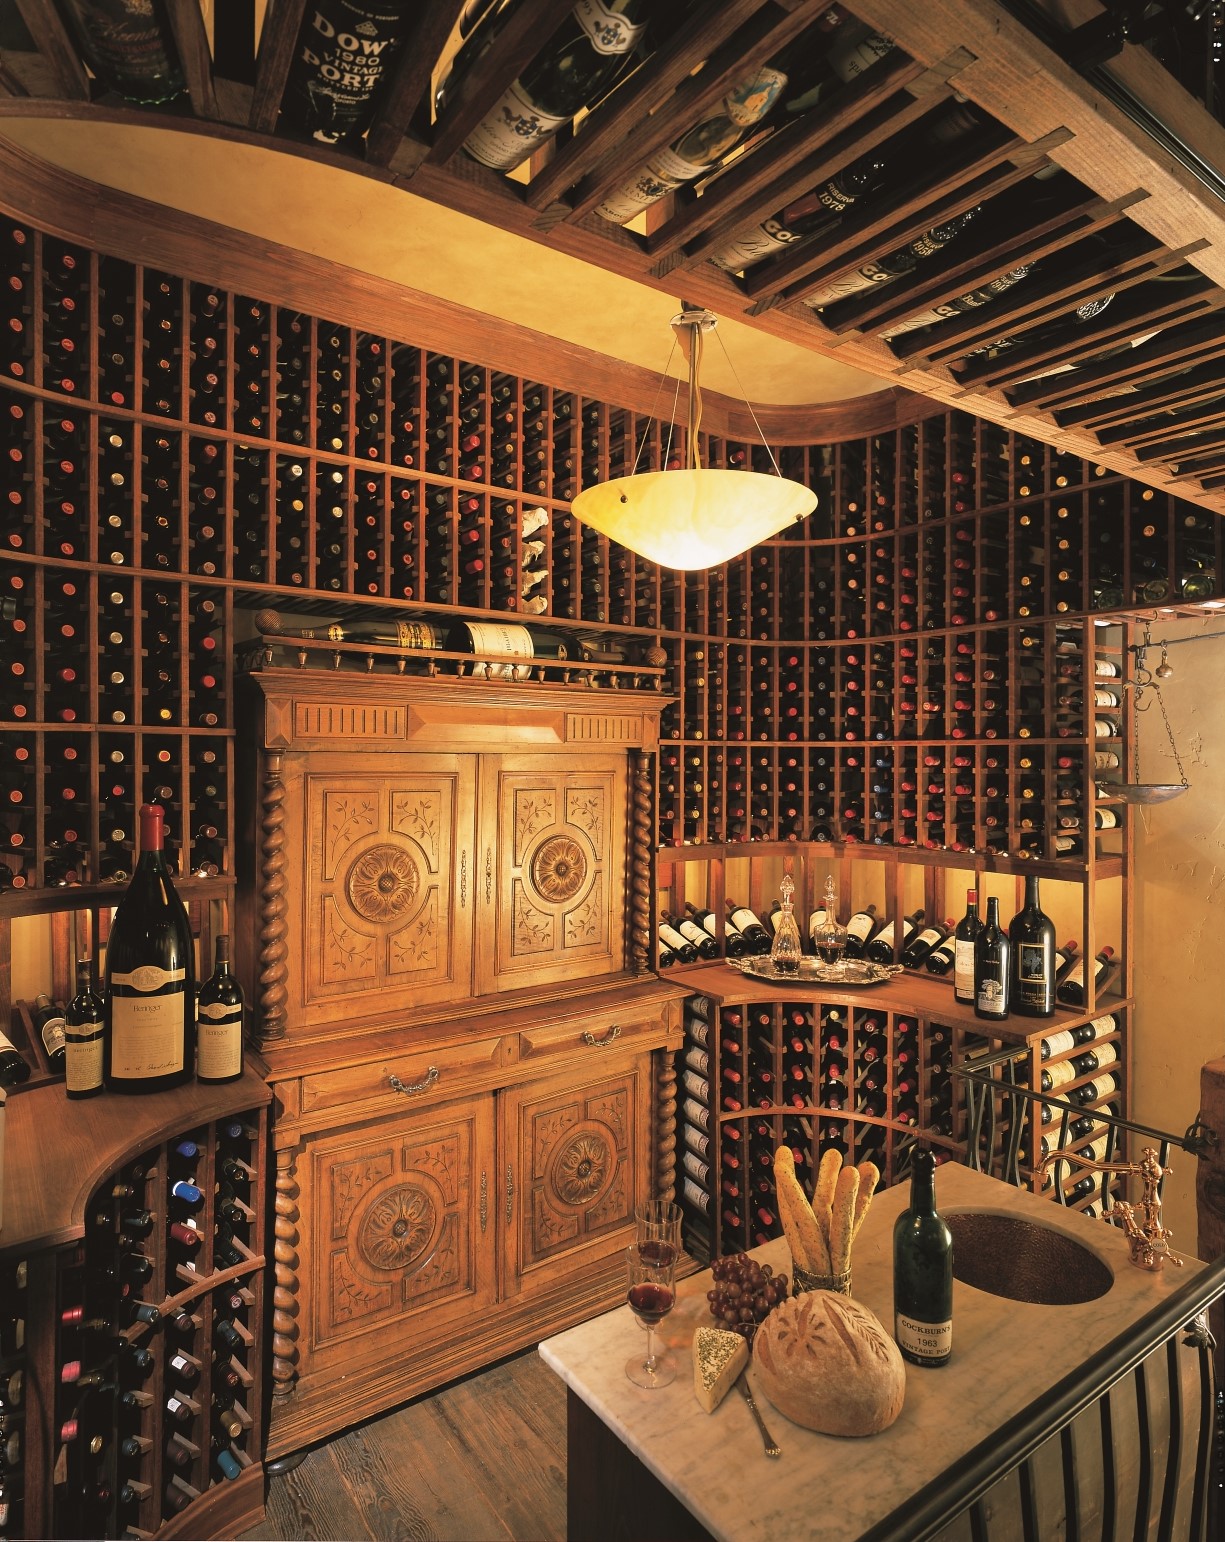
Once you have insulated your walls and found the right cooling unit, you will need some wine racks. Wine racking is available in various woods and metal. We'd be happy to work with you to design a custom racking system, or help you design a semi-custom wine racking setup from pre-built modular wine racks. See below for more information on wine racks.
Put the finishing touches on your cellar with humidifier fountains, furniture or whatever suits your personal style. We have built tasting stations and humidors into wine cellars, for example. Create a new favorite room in your home!
Wine Cellar Materials & Equipment Considerations
Wine Cellar Cooling Systems
If a climate controlled cellar is required, you will need to provide a wine cellar cooling system to properly keep the cellar at a temperature of about 55-58 degrees and humidity of 50-70%. Remember that a properly built and insulated wine cellar will allow you to use the smallest possible cooling system. Learn more about wine cellar cooling systems in our education center, or browse our selection of wine cellar cooling units. We carry both self-contained systems and split cooling systems, which allow you to place the noisiest parts of your cooling system outside your cellar. Many cooling systems come with built-in humidity management, but if yours does not or you live in a very dry climate, you may want to consider a humidification system.
Wine Cellar Racking
Common woods for wine racks include redwood and mahogany. Both are resistant to rot in the cool, damp cellar environment. Clients usually choose one over the other due to matching decor colors in the cellar design. Cedar should again be avoided due to its strong odor. Wine racking can also be found in other materials such as wire lattice. You can choose to use modular wine racking to build a semi-custom racking system, or we can help you to design and build a fully custom wine rack design. Wine stores will want to use commercial wine racks for the best storage and display for sales. Learn more about wine rack materials and construction in our education center.
Cellar Wall & Ceiling Covering
The interior wall and ceiling covering is determined by the decor theme of the cellar. Oftentimes green board is applied, then painted (always use latex paint) to match a color theme of the cellar. Also commonly used (depending upon the racking materials) is redwood tongue and groove material applied to the walls and ceiling. This T&G 1x4 paneling is the same wood species as the racking material which makes for a very uniform look throughout the cellar. Granite or other stone can also be used as a wall covering material. NEVER use cedar due to its strong aroma; it will taint wine.
Wine Cellar Doors
If a cooling system is installed, an exterior grade (1 3/4") door must be installed as a cellar door. It is very important that weather stripping is attached to all 4 sides of the doorjamb. A bottom "sweep" or threshold is also imperative. The door MUST have a very good seal to keep the cool cellar air from escaping out of the cellar. One of the most common causes of cooling units running continually (wasting energy) is not sealing the door properly. Solid core doors or doors with a full glass insert are most often used. Glass doors must have at least double-pane insulated tempered glass. For a beautiful and environmentally sound option, consider wood doors made from reclaimed wine barrel wood. Learn more about wine cellar doors in the Education Center.
Wine Cellar Flooring
All types of flooring are used in cellars. Most commonly used is slate, tile, marble, or vinyl. One unusual and attractive option is reclaimed wine barrel wood. NEVER USE CARPET. Carpet will mold and mildew in the cool, damp climate conditions of a cellar. As with wall coverings, flooring is normally chosen to match the overall decor colors of the cellar. The flooring should be applied to a level surface. It is best not to apply base trim or moldings to the walls behind the racking.
Wine Cellar Lighting
Lighting a wine cellar is an important part of the overall cellar decor. "Air Lock" recessed ceiling can lights are popular. These should be put on dimmer switches to control brightness. In many cases, track lighting is used as the main lights within the cellar. Also popular are various display lights to accent different areas of the cellar. Different types of spotlights are used to highlight picture openings, table areas, or large format display bottles. Display "rope" lighting that is specially designed and built to fit into the display angle of individual bottle racking can be an attractive addition. It is recommended that all lighting be on a timer system so they can't be left on for long periods of time. Lights cause excess heat and will cause the cooling equipment to overwork itself.
Wine Cellar Monitoring & Security
Your collection is valuable, so security is important. Some cooling systems have built-in alerts to notify you if your cellar's temperatures are fluctuating. Wine cellar monitoring and alarm systems are also an option that can give you peace of mind. At a minimum, it's a good idea to keep the door to your cellar locked. The habit of locking the door will ensure it is never accidentally left open, overtaxing your cooling unit, as well as preventing casual theft and keeping children safe.
Whether you are just beginning the process of building your own wine cellar, or you are ready to build, the experts at Vintage Cellars can help ensure that your wine is properly stored for the perfect drink.
Call us for your custom wine cellar building and design 1-800-876-8789.